
PrestaShop is purely an eCommerce platform and possesses a great CMS capability too. Though you don’t have the fully fledged controls like in the CMS platforms, you can still achieve all your basic requirements as a CMS with PrestaShop. In this post, taking PrestaShop 1.6.x and 1.7.x as the target version, I am going to explain how you can add a CMS page on PrestaShop store. Furthermore, we will also see how you can link that page to the header/footer menu.
Adding a CMS page on PrestaShop 1.6.x
Step 1: Log into your PrestaShop back-office as an admin user.
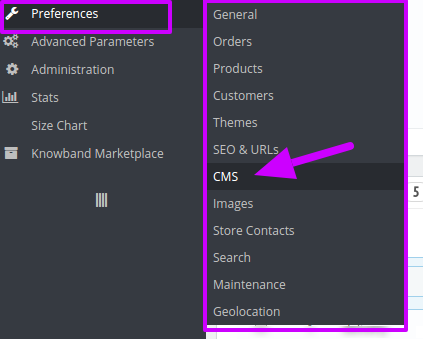
Step 2: Go to Preferences>>CMS. Here you will see all the CMS pages created on your PrestaShop store.
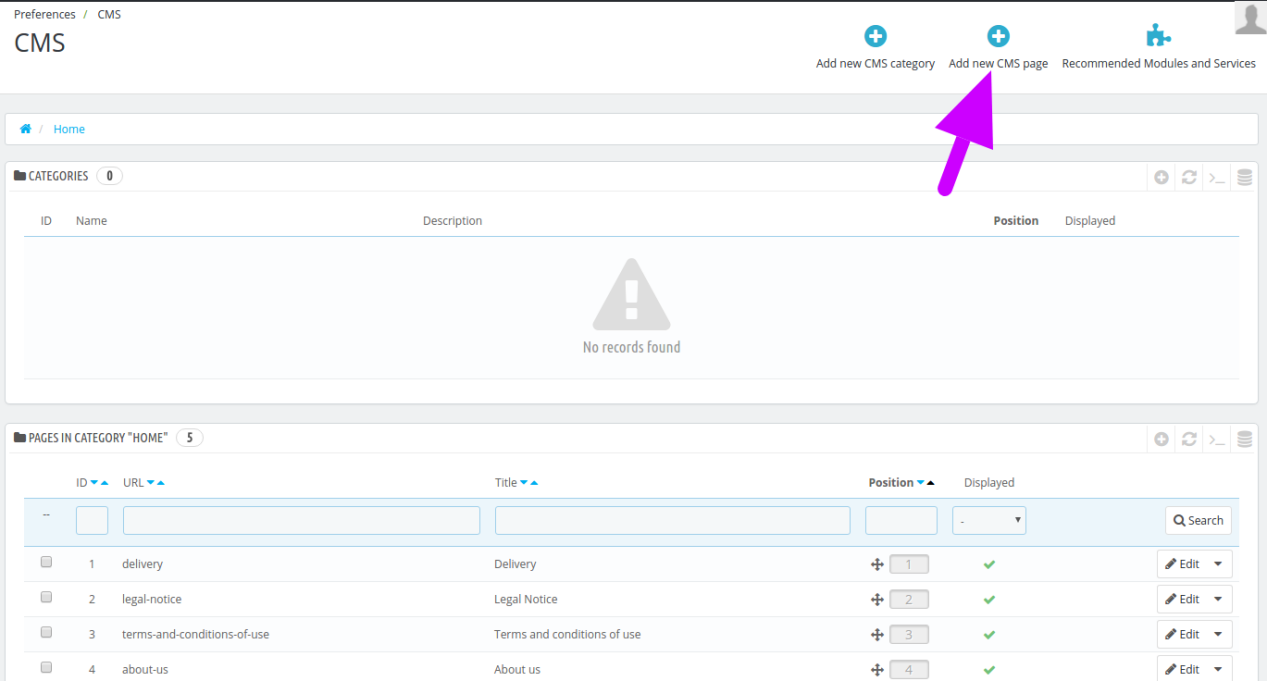
Step 3: Click on “Add New CMS Page” button at the top right corner of the page.
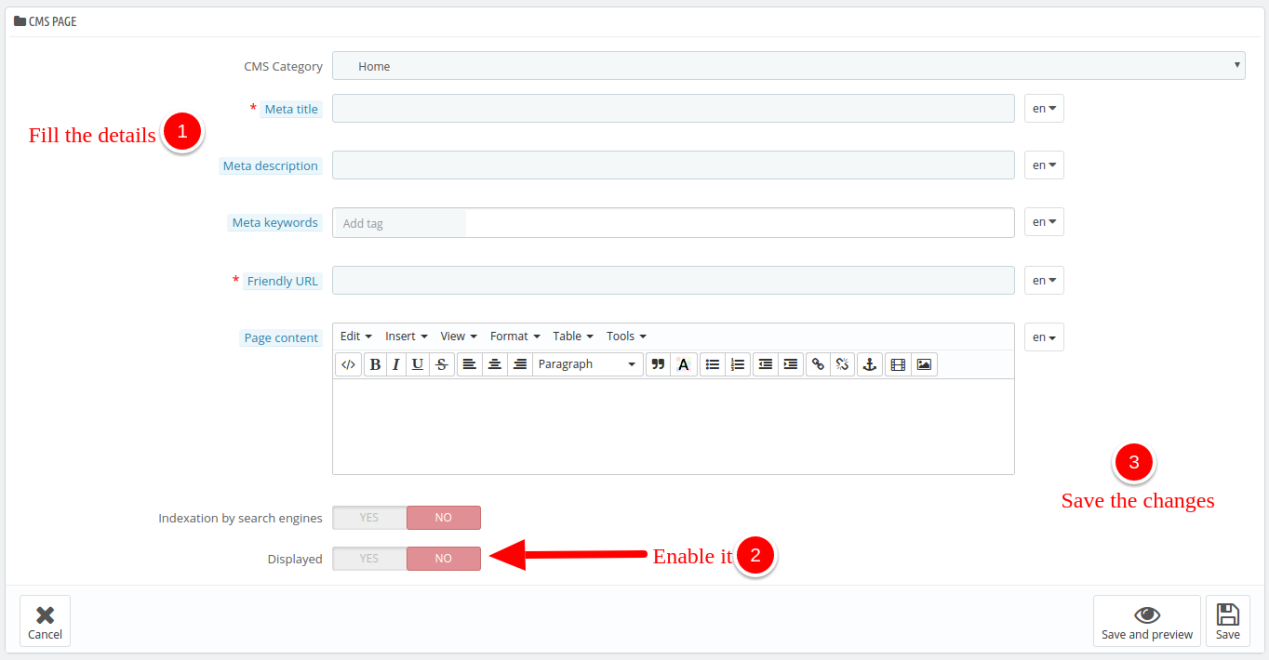
Step 4: Next, you need to fill out all the required fields. After filling the fields, just enable the page and “Save” the changes.
Step 5: Note down the CMS page ID displayed in the first column of the CMS pages list. You will need this ID later.
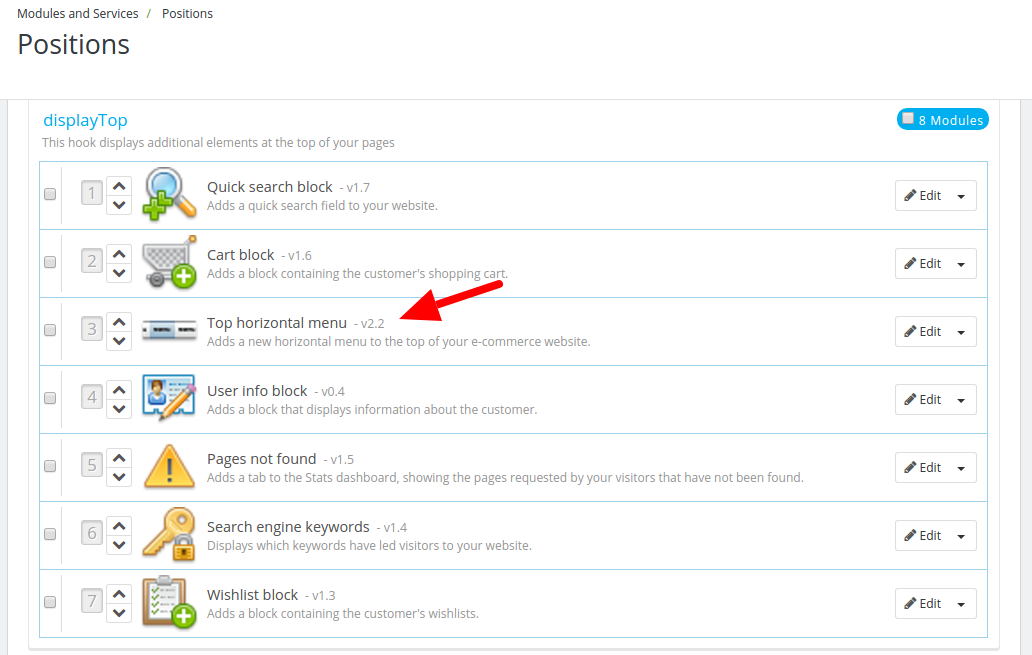
Step 6: Now, go to Module>>Positions, and check which module is showing the Top horizontal menu in your template. I found it in “displayTop” section of the position in my version.
Adding a CMS page on PrestaShop 1.7.x
Similarly for adding a CMS page in the Prestashop version 1.7.x, follow the steps mentioned-below:
Step 1: Log into your PrestaShop back-office as an admin user.
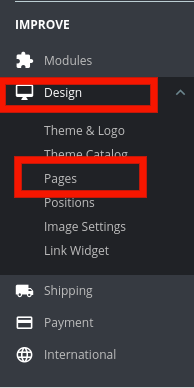
Step 2: Go to Dashboard>>Improve>>Design>>Pages as shown in the image below:
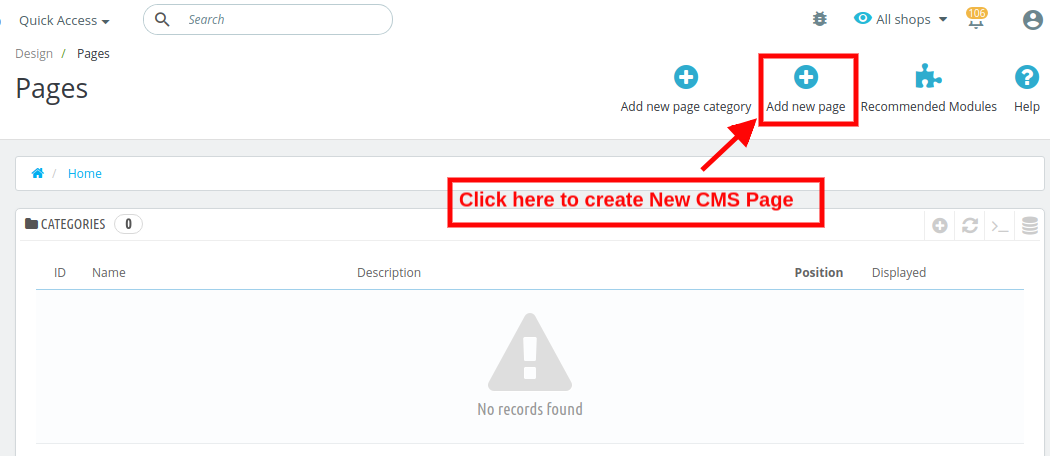
Step 3: Click on “Add New Page” button at the top right corner of the page.
Step 4: Next, you need to fill out all the required fields. After filling the fields, just enable the page and “Save” the changes.

Step 5: Note down the CMS page ID displayed in the first column of the CMS pages list. You will need this ID later. Save the changes.
Adding a link of the CMS page to the header menu
Step 1: Connect to your site’s files by logging into your FTP account. You can use FileZilla to access the files or the cPanel access if you host has provided one.
Step 2: Now, navigate to the following file directory:
themes/themeXXX/modules/blockpermanentlinks
PS: “themeXXX” is the name of your theme.
Edit, blockpermanentlinks-header.tpl file. You can use any text or code editor. I am using Netbeans for editing.
Step 3: Each of the list element in the code here represent one menu element in the Header. For example this code represents a header menu element named sitemap:
<li id="header_link_sitemap"><a href="{$link->getPageLink('sitemap')|escape:'html'}" title="{l s='sitemap' mod='blockpermanentlinks'}">{l s='sitemap' mod='blockpermanentlinks'}</a></li>
Step 4: Copy that line of code and paste it on a new line next to the one that you have copied.
Step 5: Now, change the copied code to this one:
<li><a href="{$link->getCMSLink('8', 'new')|escape:'html'}" title="{l s='new' mod='blockpermanentlinks'}">{l s='new' mod='blockpermanentlinks'}</a></li>
Step 6: Save the file. You have now added a link to the CMS page named “new” which had the Page ID “8”.
Adding a link of the CMS page to the Footer menu
How to Add a link of the CMS page to the Footer menu of Prestashop 1.7.x?
We will now link the same page to the footer menu of Prestashop 1.7.x.
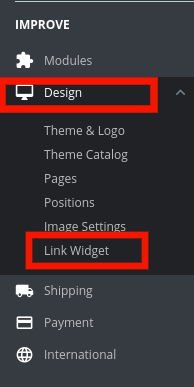
Step 1: Go to Design – > Link widget. This will display the blocks that are currently displayed on your site.
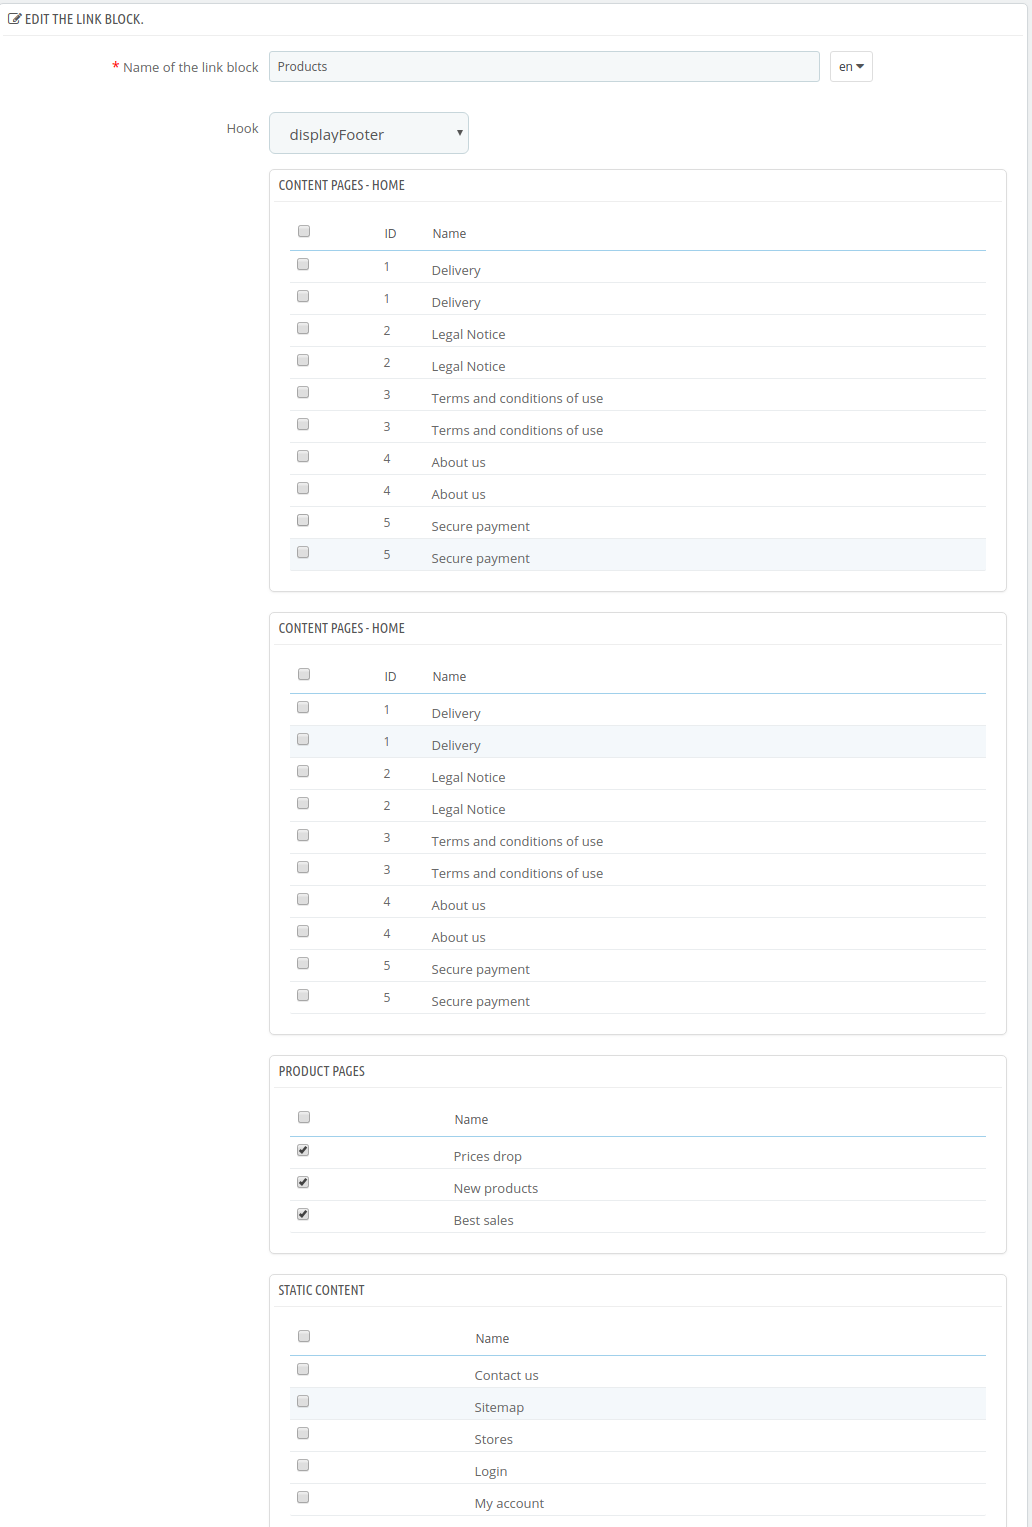
Step 2: In order to open a Block setting from the existing ones, click the Edit button corresponding to it.

In order to activate the newly created page and make it visible, select the checkbox corresponding to it’s title. You can find the link to your CMS page in the footer.
We will now link the same page to the footer menu.
How to Add a link of the CMS page to the Footer menu of Prestashop 1.6.x?
Follow the steps mentioned below to link the same page to the footer menu of Prestashop 1.6.x.
Step 1: Go to your Admin panel and navigate to “Modules & Services >> Modules & Services” and search “CMS Block” module.

Step 2: Click on the Configure button.
Step 3: Look for the “CONFIGURATION OF THE VARIOUS LINKS IN THE FOOTER” section. Here, if you find your newly added CMS page in the list.
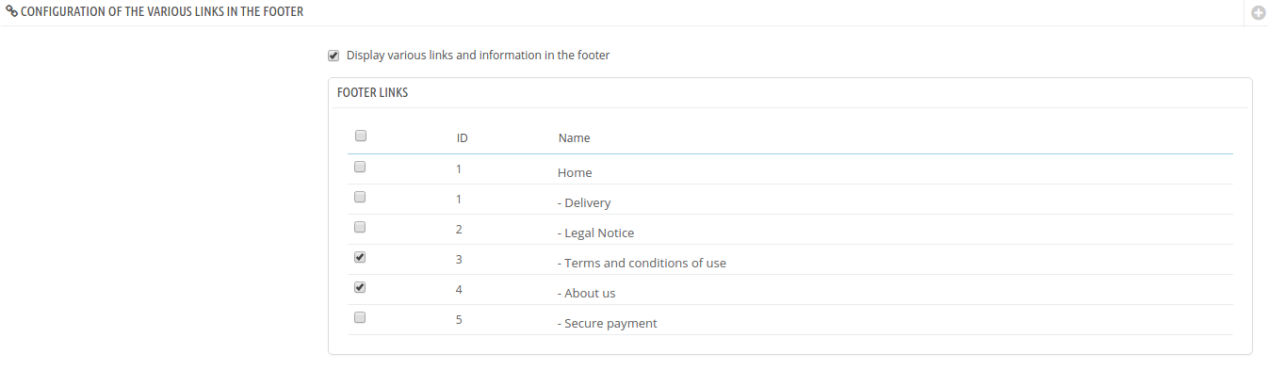
Step 4: Enable your page by clicking on the check-box in the first column. Click the “Save” button to apply the changes. You have now added a link to your CMS page on the Footer menu.
An Easier way to Create CMS Pages on Prestashop
Well, that was quite a show. We created a page, edited the codes, navigated from pages to pages and finally linked it to the Header and Footer menu. But that was just a single page we created, what if you need to link more pages? Each time editing the codes is a quite tiring job.
Is there any easier way to do that without messing with the code?
Yes, Of Course! The PrestaShop page Maker module by Knowband has been designed to serve the exact purpose. Frankly, there is a lot more it can offer. For now, let’s see how can you use this module to create CMS pages and add them to the header link without editing the code.
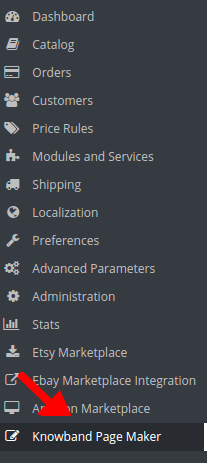
Step 1: Go to Knowband Page Maker menu in the left menu bar.
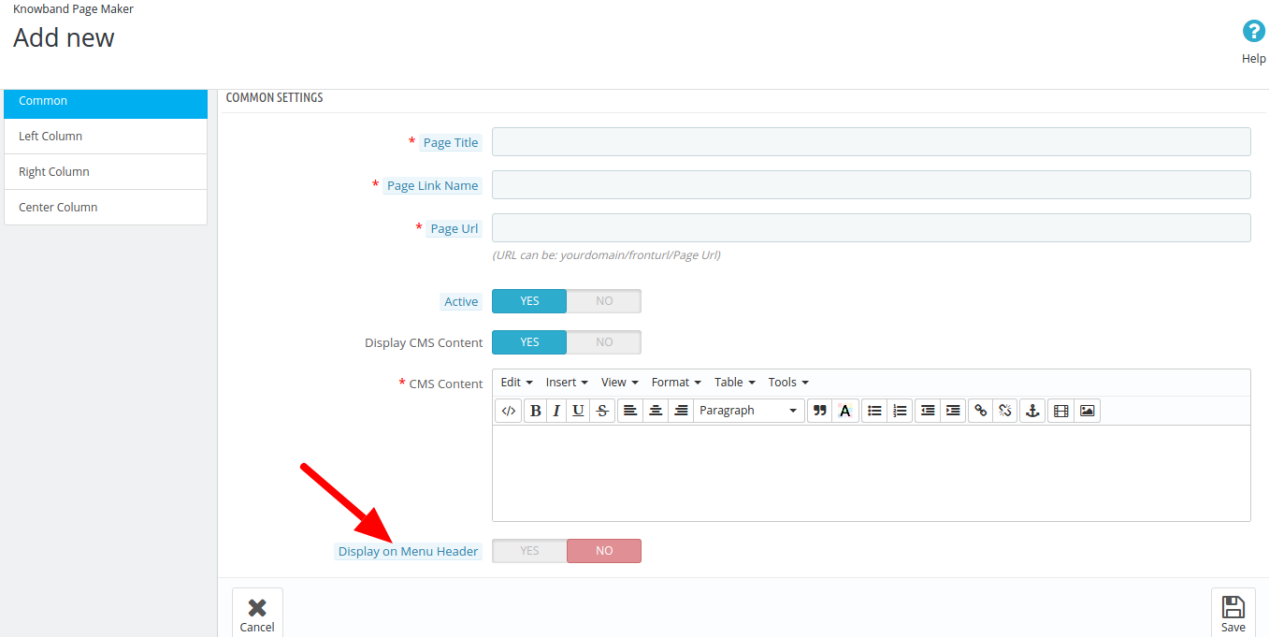
Step 2: In the next screen, Click on “Add new page” button.
Step 3: The Add new page interface consists of the four tabs. In the Common Settings tab, fill out all the details. You can give a Page Title, Page Link Name, and custom page URL.
Step 4: After filling out the details, You will see an option at the end of the page “Display on Menu Header”. You need to just enable this option and your newly added page will be instantly linked on the Header Menu.
In addition, to the ease of creation of the CMS pages, the Prestashop CMS Page Maker addon offers a number of other features. Some of them are discussed below:
- The best thing about this Prestashop page creator module is the multi-lingual functionality. Thus, the landing pages can be made in multiple any language as per the requirement of the store admin.
- The URL of the created page can be linked to the header without getting into the technicalities as mentioned above.
- Along with the generic contents, the admin even gets an option to display the Best Sellers, New Arrivals, Featured Products and Special Products as well.
- The Prestashop landing page maker addon even allows the admin to align the contents left, right or center without making any changes in the CSS of the site. This is done just at a button click.
- With the ease of creating the meta data, the page maker extension for Prestashop helps you keep it SEO-optimized.
- Additionally, you can even custom CSS codes for customizing the look and feel of the webpages.
- Along with creation, the Prestashop page maker enables you to edit or remove the CMS pages as well.
- The Prestashop addon creates mobile-responsive pages. Thus, the site will stay optimized for the mobile user even after you create new webpages.
To conclude
That was very quick. With the Prestashop Page Maker module, we did the linking in a snap of time- 4 simple steps to be exact. Fortunately, we did not have to edit any code. You have multiple options for performing the same task here, both the options are quite open, now you can choose which one is best for you.
Liked This? You’ll Like These Too